|
|
Post by roofgardener on Dec 7, 2014 13:22:58 GMT
The new Coopers of Stortford catalog has a half-page spread about the tiles. I've scanned it in below.  I cropped off the bottom half of the page, as it didn't seem to relate to gardening, so I didn't think anyone would be interested.  |
|
|
|
Post by peony on Dec 7, 2014 13:45:05 GMT
They look ideal for your 'project' roofy, perhaps you can find a pair of raspberry pink wellies to complement them?  |
|
|
|
Post by roofgardener on Dec 8, 2014 9:23:19 GMT
Bah... it will be the grey Gardening Clogs (fur lined). One alarming note; apparently the SIZE of the tiles in the above photograph is a bit misleading. The Wellies (and garden fork) in the background are actually from an Action Man kit !  |
|
|
|
Post by roofgardener on Dec 16, 2014 10:57:37 GMT
Well, the Date approaches.
I've emptied and collapsed my old 'frame-tent' greenhouse, having saved its shelving units.
All my tools, seed trays and bits and bobs are packed away in storage bins.
I just need to drain and move the Water Butt, and some old bakers trays, sweep up, and then the area is ready for the new Polytunnel.
I'm expecting to get this either on Friday 17th, or (more likely), Monday 22nd.
So putting it up... well... it COULD be before Christmas I suppose, but it is more likely to be Boxing Day, or the following Saturday.
Erecting it will be fun. It's such a tight fit that I can't erect it in the main roofgarden area and then push it into position... the Pointless Chimney will get in the way !
Instead, I think I'm going to have to assemble the base and one level of side-wall. (up to waist height), then drag the PVC cover over the partial frame, and then climb inside and continue assembling upwards from inside !!
This will be extra-exciting because - at 2m tall - I'll need to be on a stepladder, inside the partially built unit, with the cover all collapsed around me. Some of the poles will undoubtedly have sharp ends (untill locked into position), so I'll have to be carefull not to rip the cover on them. Perhaps I should tape the ends up, or push washing-up sponges down them ?
|
|
|
|
Post by Cherry on Dec 16, 2014 17:57:42 GMT
What a dilemma. Hope your work it out ok.  |
|
|
|
Post by daitheplant on Dec 16, 2014 19:30:48 GMT
Roofy, how much space will you have around the tunnel?
|
|
|
|
Post by roofgardener on Dec 16, 2014 19:49:16 GMT
Roofy, how much space will you have around the tunnel? Not even inches Daithpelant... we're down to centimeters... and only a couple either side ! I've ordered a LARGE tub of vaseline !!!   |
|
|
|
Post by daitheplant on Dec 16, 2014 19:56:36 GMT
I think you are right to try it your way then. Best of luck. Or, you could put the frame together in situ, then pull the cover over from the front.
|
|
|
|
Post by roofgardener on Dec 17, 2014 14:57:31 GMT
Yup - I did consider that. But at 2m tall, it would be very hard work. If I try and pull the cover over the completed frame, then it is a very tight fit, with almost no slack to work with. If I was 2m tall, and had FOUR arms, each 6' in length, then it would be easy. I'd just stand in the middle of the frame, with a corner of the cover in each hand, and then gradually lower all four hands over the four corners of the frame, and ease it down an inch at a time.
Sadly, I am not equipped with four 6' long arms. I'm The Roofgardener, not Otto Octavius.
So instead, I will just build up the END part of the frame, leaving the rest just 3' tall. That way, there is ample slack in the fabric for it to be stretched over aforementioned end-part of the frame.
Then... with me INSIDE the fabric (like being inside a collapsed tent), I can gradually build up the rest of the frame from within, pushing up against the fabric and gradually stretching it into place, until I reach the last part to be assembled (the entrance), and realise that one of the poles is the wrong size, and that two nuts and one bolt are missing !
Failing that, I will gradually come to realise that - as the greenhouse tent takes shape - the floor appears curved upwards, and the ceiling is flat. Or that the tent is only 2m long, but 3m tall.
|
|
|
|
Post by roofgardener on Dec 19, 2014 20:35:35 GMT
It... has arrived.  |
|
|
|
Post by daitheplant on Dec 19, 2014 21:01:09 GMT
Hallejulah.
|
|
|
|
Post by roofgardener on Dec 20, 2014 10:13:56 GMT
ZOMG... the Pink Tiles have arrived as well !!!!  |
|
|
|
Post by roofgardener on Dec 31, 2014 10:03:35 GMT
A new era on the Roofgarden has just begun... IT IS BUILT !!!!! 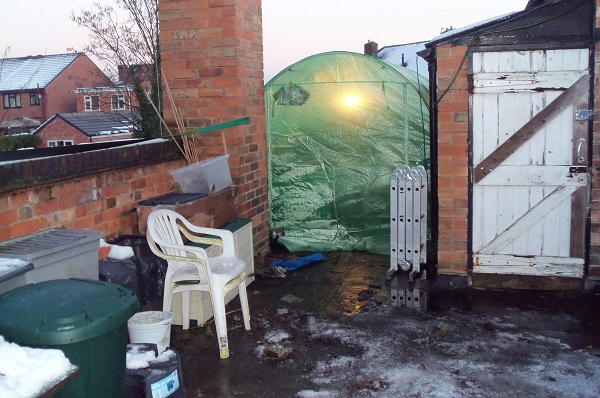 A modest structure compared to Daitheplant's Mighty Erection, to be sure. But it is bigger than anything I've ever had before. Well... the heating and lighting is on, and the wine has been poured... shall we go inside ? 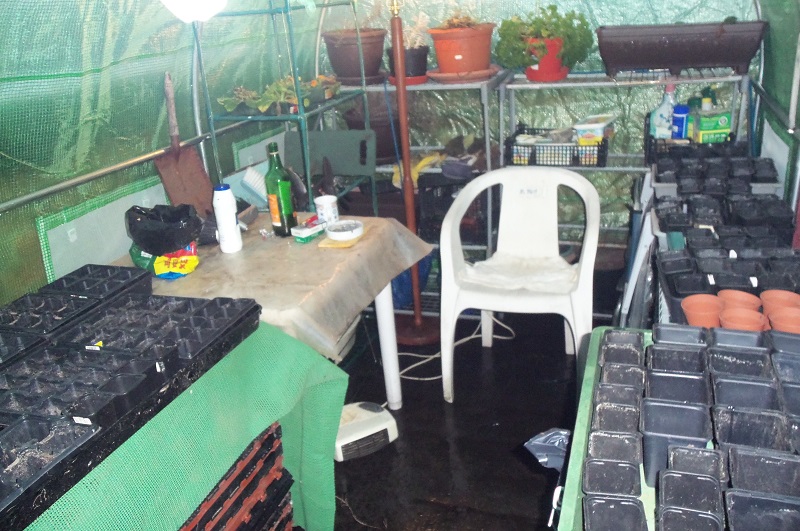 The shelving etc is all improvised bits n' bobs recovered from my previous greenhouses and standing units, with an old Cheap Plastic Garden Table (with a plastic sheet) acting as my potting table. Not ideal... it really needs edging to stop the soil falling off... but its all I've got at the moment. The large seedling table to the front-left is actually two piles of bakers trays/baskets, covered in an old groundsheet from my camping days. This is in "potting/germinating" mode. Previously, I've only ever been able to put around 80 potting 'cells' out at once. Now, I've got slightly under 200 deployed - all with gravel trays to stop water getting everywhere. Once they are potted, I can extend onto the potting table itself, giving me around 250 cells. I'll be buying three or four of THESE things over the next two months, and scattering them around the roofgarden.  . As my seedlings start to grow, and the weather improves, my thinking was to gradually move the seedling cell trays out of the main greenhouse, and into these 'satellite' greenhouse for them to harden, prior to planting out at my Sisters. (I should explain that my main reason for getting the Polytunnel was to allow me to grow decorative border flowers for my Sisters garden .. which is big, and needs LOTS of flowers). As more plants move out to the satellites, the main Polytunnel will gradually switch mode into a growing area for things like tomatoes, capsicums, and Herbs. I might even remove some of the shelving. Eventually, it will go into "over-wintering" mode those plants too delicate for colder weather. And - also for the first time - I've got the storage... STOOOOORRRAAAGEEEE ... to have everything organised and to-hand. 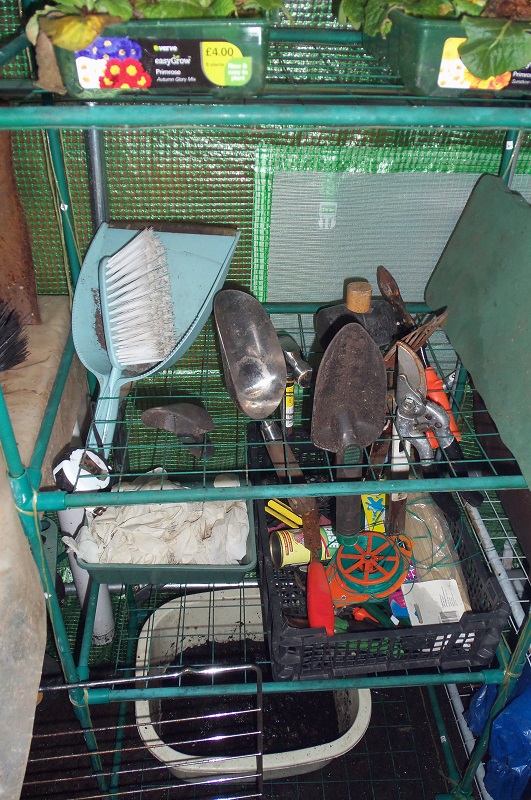 "A Place for Everything" 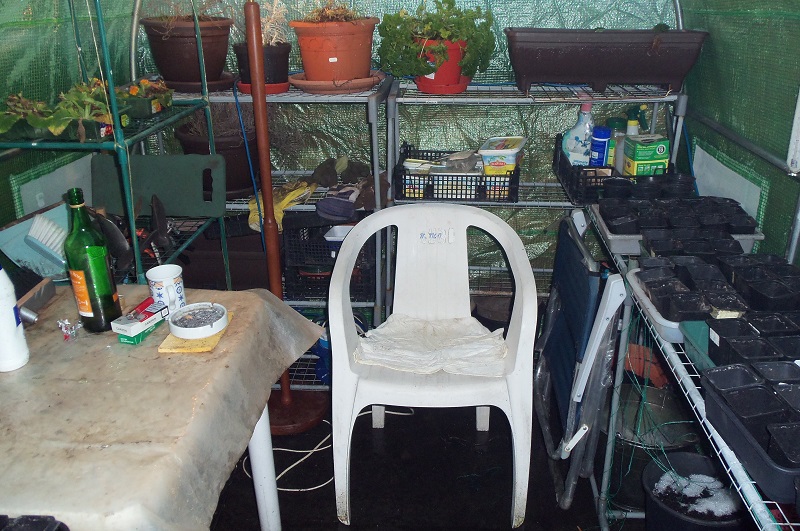 Seed store (in the margerine tubs) and "Lotions and potions" (bug spray, plant food, slug repellent etc etc). Oh... I put SOME of my plants in already... from left to right: Neglected Drowned Primroses (incredible that they're still alive), frozen Thyme, Wilted Cineraria, Soggy Chives, Perky Parsley, and strawberries. Oh... and the Plucky Little Fanheater is working well ... though I have to shelter it under the Cheap Plastic Table to keep it dry; Daitheplant wasn't kidding about condensation. 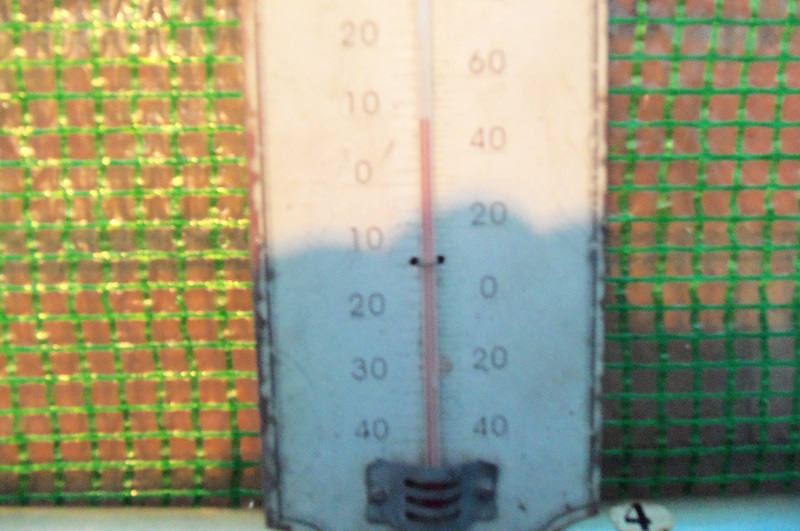 "With needles hovering in the red...". Almost up to 10 degrees, with it being zero outside. Oh... I havn't been able to put down the floor matting, or implement the "wet/dry" zone yet. It's not safe to walk on the Roofgarden without hiking boots, and they take TOO long to take off/put on each time I cross the threshold. However.. the weather forecast suggests that it will rain this weekend, and warm up, so all the ice will dissapear. Sorry to ramble on for so long ... and I know this must be old-hat for all you experts. Sneer if you will, but be happy for a Roofgardener who .. finally .. has got the "toolkit" he always needed, but never realised it. Look... OK .. if it will make you happier, I'll grow a darned Dahlia ! Just the one, though !  |
|
|
|
Post by Cherry on Dec 31, 2014 16:43:44 GMT
'Sneer' Roofy? Wrong word. There is not a person on here who would criticize your handiwork. I have never thought to put the tools with handles through the mesh shelves. Mine are in a plant pot or sitting in unsuitable places. Yours look very neat.  |
|
|
|
Post by roofgardener on Dec 31, 2014 18:42:46 GMT
My thinking was to allow the 'blades' of the tools to dry out, Cherry.
I'm also lucky in having a shop below the RoofGarden, and I get to use his old plastic baskets etc (hence - for example - the black plastic tray/basket with the garden twine in it, or the margerine tubs on the back shelf.).
Well.. time to start USING the beast. I should be getting the new compost on Friday, so time to start potting !
|
|